Managing SAML Authentication
Applies to: IBM StreamSets as a Service
After you enable SCIM provisioning, you use the IdP to manage provisioned users and groups.
Testing the Draft Configuration
When SP-initiated logins are enabled, you can test that the draft SAML configuration is set up correctly with your identity provider (IdP). Test the draft configuration after modifying the configuration and before publishing it to production.
- In the Control Hub Navigation panel, click .
- Click Configure SAML.
- Click the Draft tab.
- Modify the draft configuration as needed.
-
In the Organization SAML Settings section, click
Test.
The SAML debug console displays, indicating whether IBM StreamSets is able to successfully send a request to your identity provider and receive a response. In case of a failure, use the listed errors to help you troubleshoot issues.
Resetting the Draft Configuration
To discard your edits to the draft configuration, you can reset the draft to override changes in the draft configuration with the published production configuration.
- In the Control Hub Navigation panel, click .
- Click Configure SAML.
- Click the Draft tab.
- In the Organization SAML Settings section, click Reset Draft.
-
Click Confirm.
Control Hub overrides changes in the draft configuration with the published production configuration.
Publishing the Draft Configuration
After completing the draft configuration, you publish it to production.
The production configuration is read-only. To edit the SAML settings, you must edit the draft configuration and then publish that modified draft.
- In the Control Hub Navigation panel, click .
- Click Configure SAML.
- Click the Draft tab.
- In the Organization SAML Settings section, click Publish.
-
Click Confirm.
Control Hub publishes the configuration, displaying the Production tab in your organization SAML settings.
If your organization has an enabled production configuration, Control Hub automatically enables the newly published configuration.
If your organization has a disabled production configuration, the newly published configuration is also disabled. You must enable the production configuration to activate it.
Rotating the Service Provider Certificate
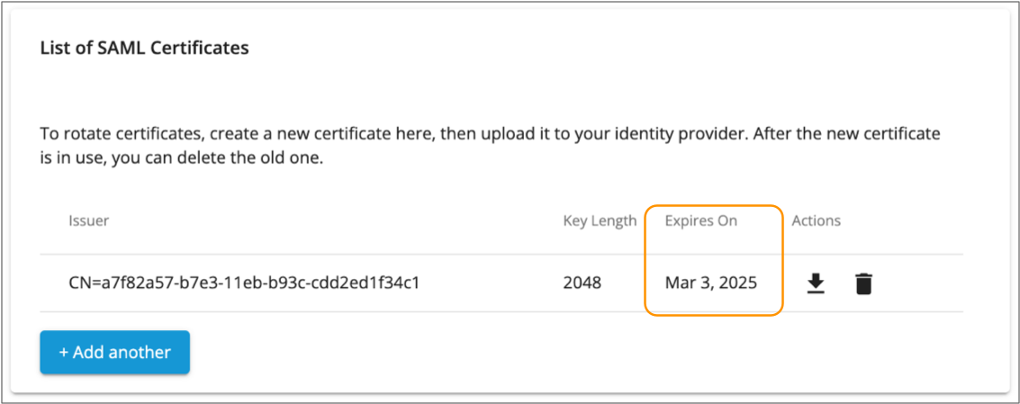
IBM StreamSets generates a unique service provider certificate for your organization. Each service provider certificate has an expiration date. You can create a new certificate and then rotate the certificate in your identity provider (IdP) when the expiration date approaches.
You can find the expiration date for your certificate in the List of SAML Certificates section, as follows:
- In the Control Hub Navigation panel, click .
- Click Configure SAML.
- Click the Draft tab.
-
In the List of SAML Certificates section, click
Add Another.
The New Certificate dialog box appears.
- Optionally, modify the default expiration date and key length for the certificate.
- Click Save.
-
In the Actions column for the newly added certificate,
click the Download icon:
 .
.
The certificate is saved to your default downloads directory.
-
Log in to your IdP and upload the new service provider certificate.
The steps to upload the certificate depend on the IdP that you use. See your IdP documentation for instructions.
-
In your Control Hub organization SAML settings, test that the new certificate works
successfully.
After a successful test, you can delete the outdated certificate.
-
In the List of SAML Certificates section, click the
Delete icon (
 ) in the Actions column for the outdated
certificate.
) in the Actions column for the outdated
certificate.
Enabling the Production Configuration
After you publish a draft configuration to production, you enable the production configuration to activate it. When enabled, all organization users must log in using SAML authentication.
- In the Control Hub Navigation panel, click .
- Click Configure SAML.
- In the Production tab, click Enable.
-
Click Confirm.
You are logged out of IBM StreamSets. To log in again, use SAML authentication. Or as a user with the Organization Administrator role, you can log in using local or public identity provider authentication to access the Control Hub organization SAML configuration page only.
Disabling the Production Configuration
You can disable the production configuration to disable SAML authentication for your organization. When disabled, all organization users must log in using local or public identity provider authentication.
- In the Control Hub Navigation panel, click .
- Click Configure SAML.
- In the Production tab, click Disable.
-
Click Confirm.
You are logged out of IBM StreamSets. To log in again, use local or public identity provider authentication.
Logging In when SAML is Incorrectly Configured
If SAML authentication is enabled but the IdP or the SAML configuration in Control Hub is incorrectly configured, no organization users can log in to IBM StreamSets using SAML authentication. In this case, a user with the Organization Administrator role can log in using local or public identity provider authentication to access the Control Hub organization SAML configuration page only.
-
Enter the following URL in the address bar of your browser:
https://cloud.login.streamsets.com -
Log in as a user with the Organization Administrator role using one of the
following authentication methods:
- Local - Enter your email address and password.
- SSO with a public identity provider - Continue with a public identity provider account, such as Google or Microsoft.
-
Select the organization to use, and then click Configure
SAML.
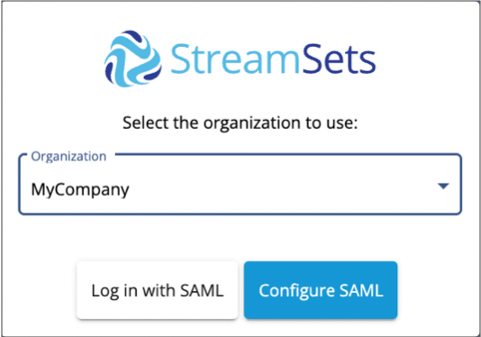
The organization SAML configuration page displays.
-
Use the following tabs to resolve the issues:
- Production tab - You can temporarily disable SAML authentication so that users can log in using local or public identity provider authentication until you can resolve the SAML issues.
- Draft tab - Edit, test, and publish an updated SAML configuration.
Managing Provisioned Users and Groups
If SCIM provisioning is enabled for your organization, then you manage users and groups within your identity provider (IdP). All changes made in the IdP are automatically synchronized to IBM StreamSets.
- Invite, activate, deactivate, or delete users.
- Create or delete groups.
- Update user or group details.
- Update your display name or leave the organization in your account settings.
Although the default all group is not provisioned from the IdP, you also cannot update the display name or update the users that belong to the all group.
You do use Control Hub to assign roles and permissions to provisioned users and groups.