Enabling SAML using Okta
Applies to: IBM StreamSets as a Service
Step 1. Retrieve IdP Information
In Control Hub, choose Okta as your identity provider and then retrieve the IdP information generated for your organization.
- As a user with the Organization Administrator role, log in to IBM StreamSets using local or public identity provider authentication.
- In the Control Hub Navigation panel, click .
- Click Configure SAML.
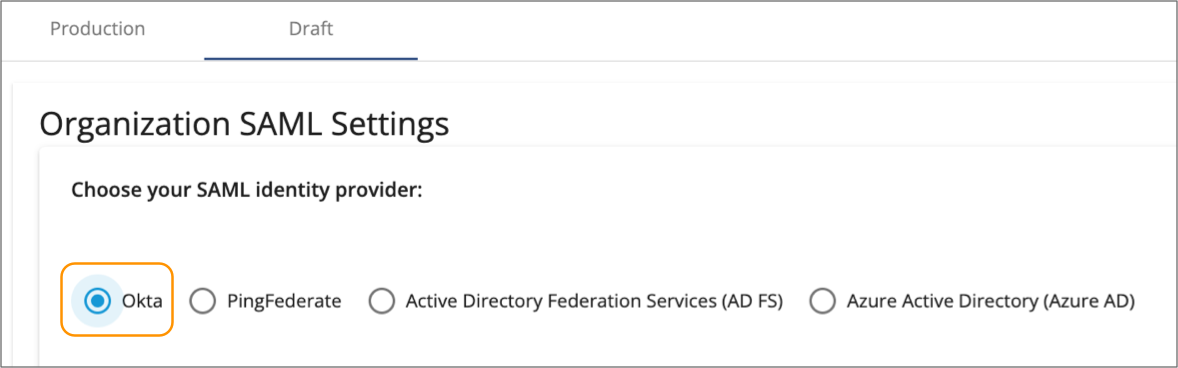
- Click the Draft tab.
-
Choose Okta as your SAML identity provider.
-
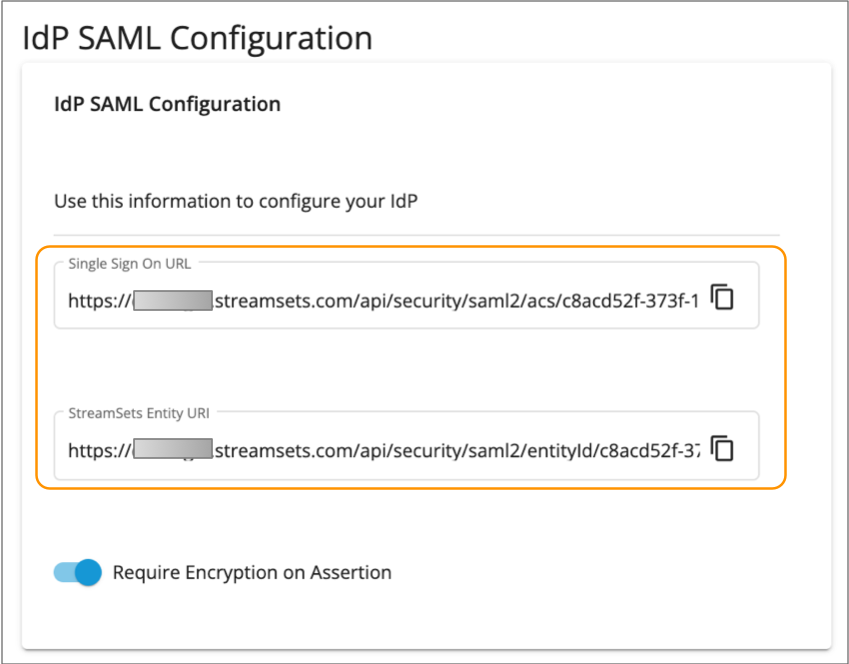
In the IdP SAML Configuration section on the right, verify
that the Require Encryption on Assertion property is
enabled and then copy the following values and save them in a temporary
location:
- Single Sign On URL
- StreamSets Entity URI
-
To configure IBM StreamSets to sign SAML requests and to configure Okta to encrypt SAML response
assertions, download the IBM StreamSets SAML certificate by clicking the Download icon (
 ) in
the List of SAML Certificates section on the right.
) in
the List of SAML Certificates section on the right.
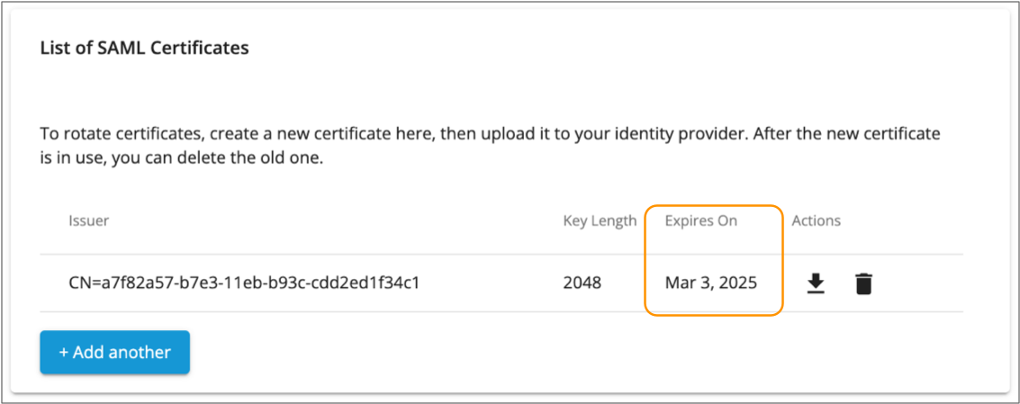
The certificate is saved to your default downloads directory. For more information, see Service Provider Certificates.
- Click Save to save the changes made to the draft SAML configuration.
Step 2. Create an Okta App Integration
To register IBM StreamSets as a service provider in Okta, use the IdP information that you retrieved from Control Hub to create a SAML app integration in Okta. Then, assign the app integration to all Okta users that need to log in to IBM StreamSets.
- In the Okta Admin Console, click .
- Click Create App Integration.
- In the Create a new app integration dialog box, select SAML 2.0, and then click Next.
-
In the General Settings step, enter an app name.
For example, you might enter StreamSets.
-
Optionally, add a logo for the app integration that displays on the Okta
dashboard.
For example, you might add a logo, as follows:
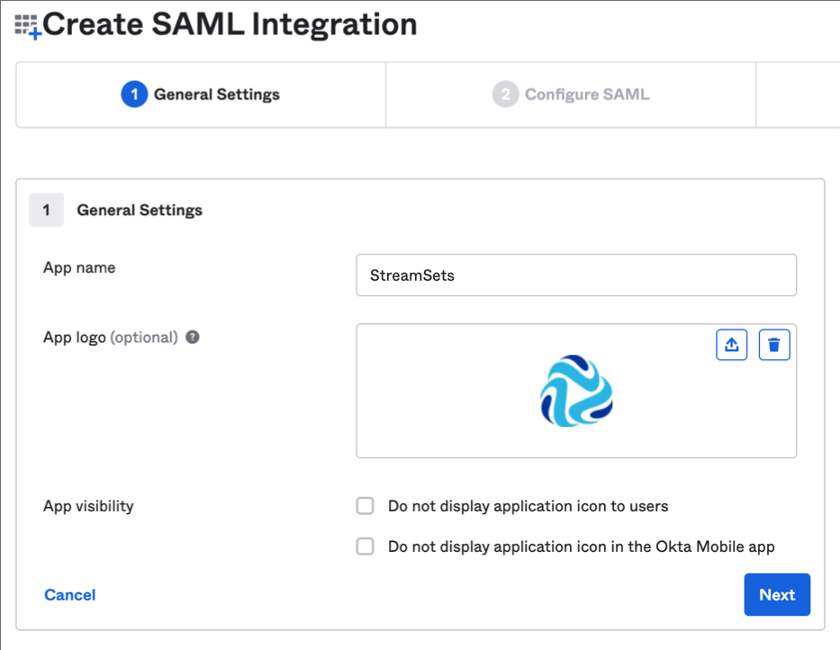
- Click Next.
-
In the Configure SAML step, configure the following
properties:
Property Description Single sign on URL Paste the Single Sign On URL value that you copied from Control Hub. For example:
https://<location>.streamsets.com/api/security/saml2/acs/<unique
                                                ID>
Audience URI (SP Entity ID) Paste the StreamSets Entity URI value that you copied from Control Hub. For example:
https://<location>.streamsets.com/api/security/saml2/entityId/<unique
                                                ID>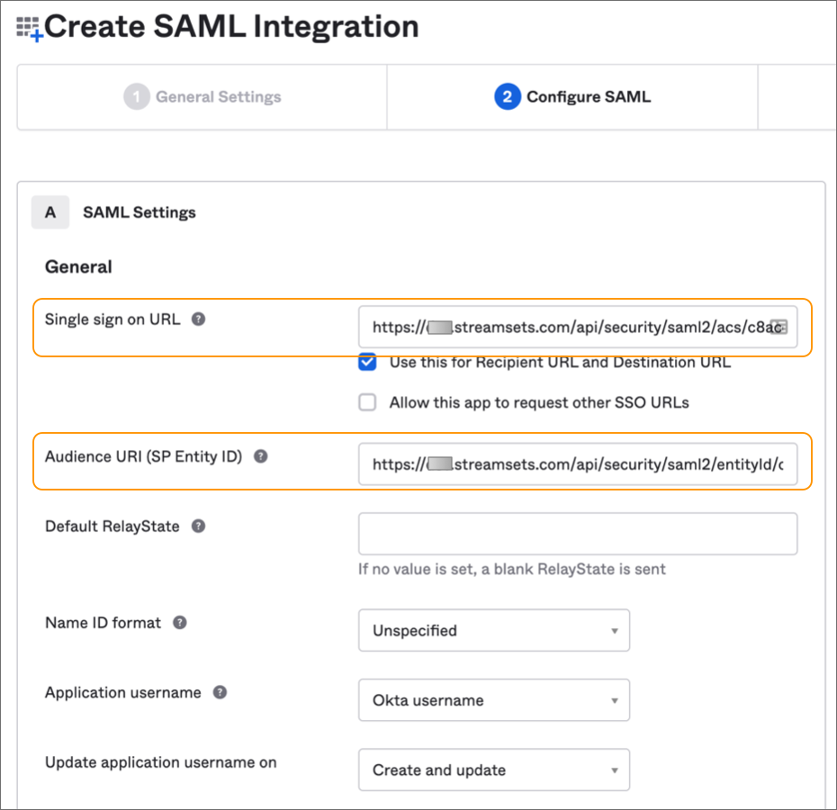
-
Configure the Okta app integration to encrypt the SAML assertion.
-
Optionally, configure attribute statements so that Okta passes each user's
first name and last name to IBM StreamSets.
Okta always passes each user's email address to IBM StreamSets. For more information, see IdP Attribute Mappings.
In the Attribute Statements section, add the following statements:Name Name Format Value firstName Basic user.firstNamelastName Basic user.lastName - Click Next.
-
Enter your feedback on the Feedback tab, and then click
Finish.
The IBM StreamSets app integration displays.
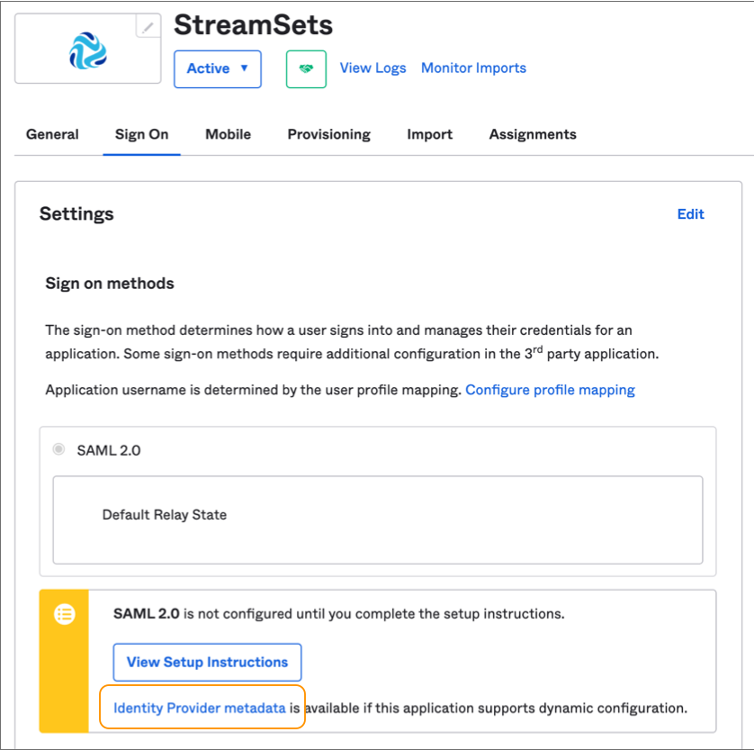
-
In the Sign On tab, right-click the Identity
Provider metadata link and save the IdP metadata to a
file.
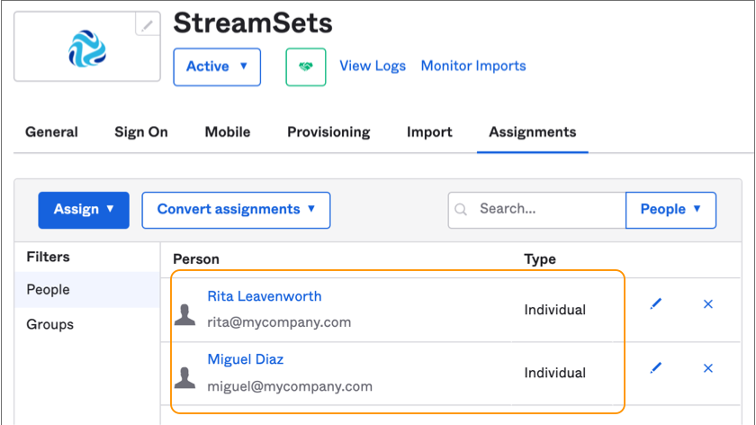
-
Click the Assignments tab, and then assign the app
integration to all Okta users that need to log in to IBM StreamSets.
For detailed steps about assigning applications to users, see the Okta documentation.
For example, the following image shows an app integration that has been assigned to two users:
Step 3. Set up a Draft SAML Configuration
In Control Hub, set up the draft SAML configuration for your organization by uploading the IdP metadata XML file downloaded from Okta, and then optionally configuring advanced properties. You can also enable or disable SP-initiated logins.
- In the Control Hub Navigation panel, click .
- Click Configure SAML.
- Click the Draft tab.
-
In the Organization SAML Settings section, click
Upload Metadata File from IdP and upload the metadata
file that you downloaded from Okta.
By default, the IdP Login Page property is automatically populated from the uploaded metadata, and SP-initiated logins from IBM StreamSets are enabled, as follows:
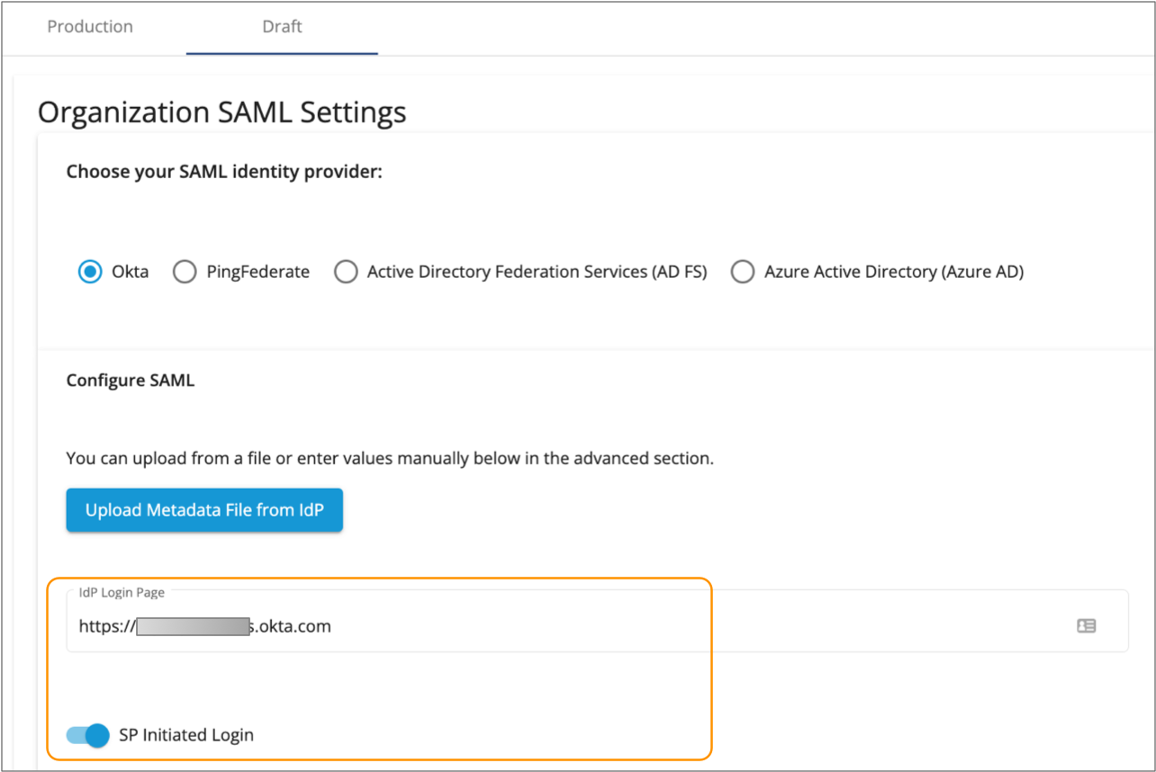
-
To disable SP-initiated logins and require IdP-initiated logins, disable the
SP Initiated Login property.
For more information, see IdP and SP-initiated Logins.
-
If you created custom attribute statements in Okta that do not match the
default values displayed for the IdP user properties, modify the property values
as needed.
In most cases, you can use the default values. For more information, see IdP Attribute Mappings.
-
Optionally, click Show Advanced and modify the advanced
properties.
Control Hub automatically populates the advanced property values from the uploaded metadata file. In most cases, you do not need to modify the advanced properties.
- Click Save.
-
If you enabled SP-initiated logins, click Test to test
the configuration.
The SAML debug console displays, indicating whether IBM StreamSets is able to successfully send a request to Okta and receive a response. In case of a failure, use the listed errors to help you troubleshoot issues.
Step 4. Publish and Enable the SAML Configuration
After testing and validating that the draft SAML configuration is set up correctly with Okta, publish the configuration to production and then enable the configuration to activate it.
- In the Draft tab, click Publish in the Organization SAML Settings section.
-
Click Confirm.
The Production tab displays a read-only version of the SAML configuration.
- In the Production tab, click Enable to enable SAML authentication for your organization.
-
Click Confirm.
When enabled, all organization users must log in using SAML authentication. For more information, see IdP and SP-initiated Logins.
To invite new users to the organization, first use Okta to assign the users to the IBM StreamSets app integration. Then in Control Hub, use the email addresses from Okta to invite the users. For more information, see Adding Users.
If existing organization users are assigned to the IBM StreamSets app integration in Okta and originally joined with their email address from Okta, they can use SAML authentication for the next login session. If existing organization users joined with a different email address, you must add them to the Control Hub organization again using the email address from Okta.