Enabling SAML using AD FS
Applies to: IBM StreamSets as a Service
When using Microsoft Active Directory Federation Services (AD FS) as an identity provider, complete the following steps to enable SAML authentication for your organization:
- Retrieve IdP information generated for your organization.
- Create an AD FS relying party trust for IBM StreamSets.
- Set up a draft SAML configuration for your organization.
- Publish and enable the SAML configuration.
Step 1. Retrieve IdP Information
In Control Hub, choose AD FS as your identity provider and then retrieve the IdP information generated for your organization.
- As a user with the Organization Administrator role, log in to IBM StreamSets using local or public identity provider authentication.
- In the Control Hub Navigation panel, click .
- Click Configure SAML.
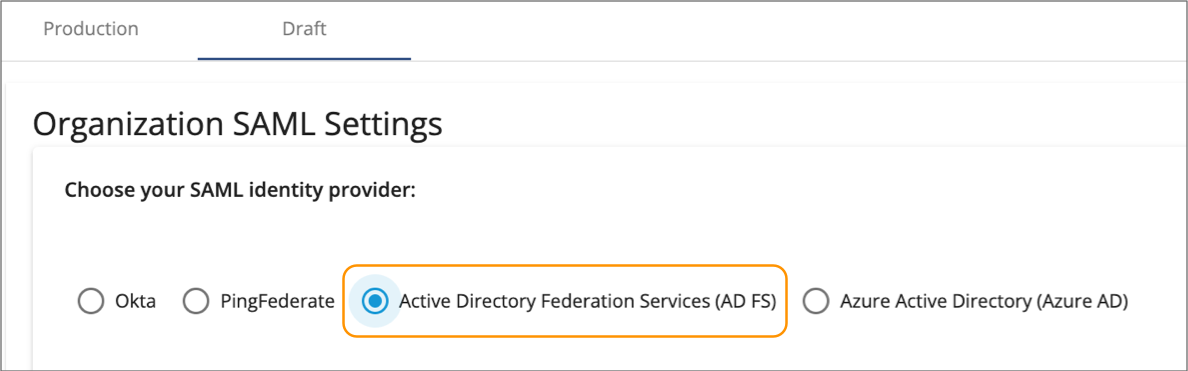
- Click the Draft tab.
-
Choose AD FS as your SAML identity provider.
-
In the IdP SAML Configuration section on the right, verify
that the Require Encryption on Assertion property is
enabled and then click Download StreamSets SAML
Metadata.
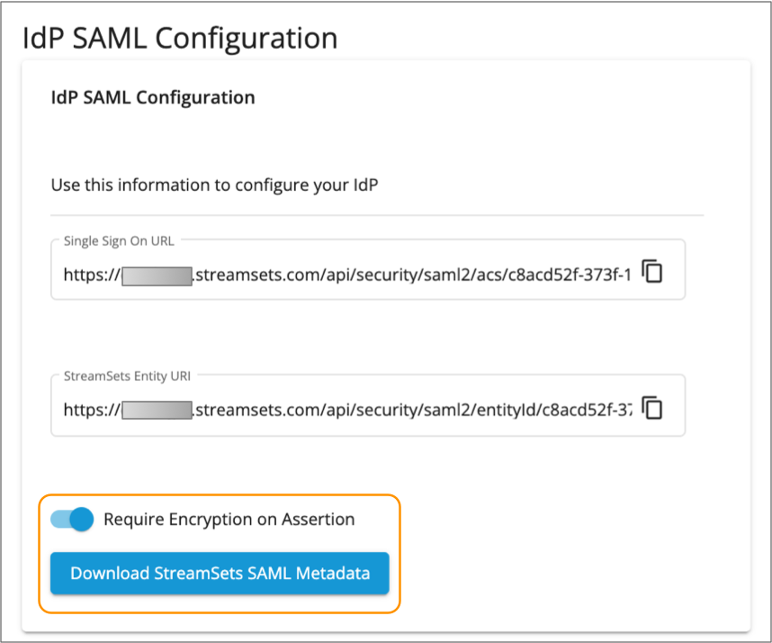
The metadata XML file is saved to your default downloads directory.
- Click Save to save the changes made to the draft SAML configuration.
Step 2. Create an AD FS Relying Party Trust
To register IBM StreamSets as a service provider in AD FS, use the IdP information that you retrieved from Control Hub to create a relying party trust in AD FS.
Then, configure a claims issuance policy for the trust to send email addresses and optionally user names of Active Directory Domain Services (AD DS) users to IBM StreamSets. Any user in AD DS can log in to IBM StreamSets, as long as the user is invited to the Control Hub organization using the AD DS email address.
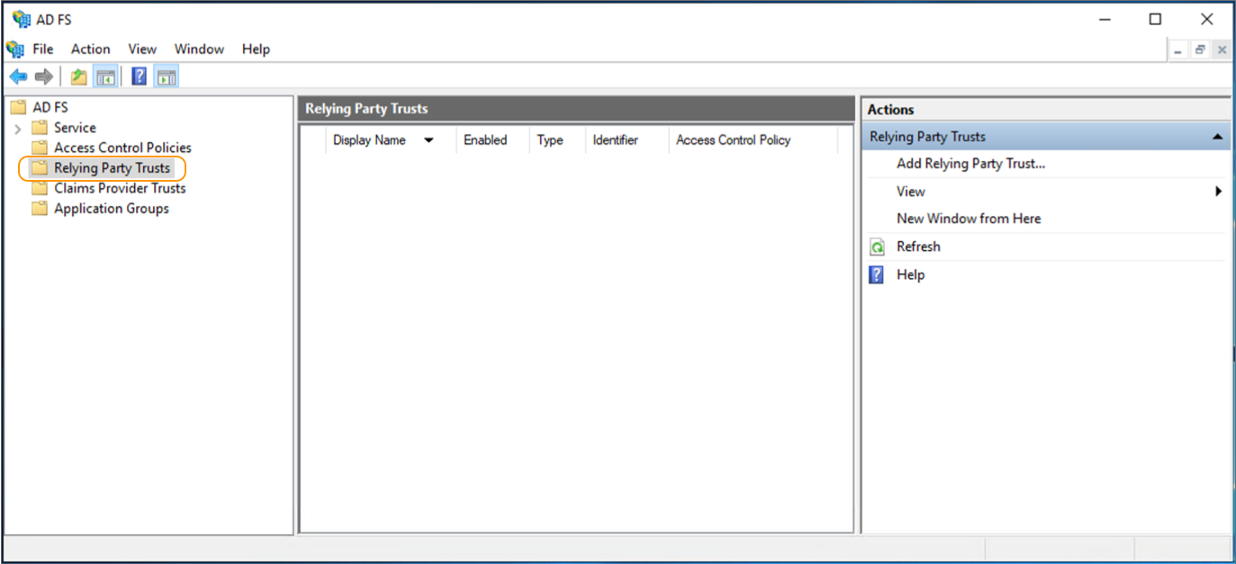
- Open Server Manager on the server that is running AD FS, and then click .
-
Right-click the Relying Party Trusts folder, and then
select Add Relying Party Trust.
- In the Welcome page of the wizard, select Claims aware, and then click Start.
-
In the Select Data Source page of the wizard, select
Import data about the relying party from a file, and
then click Browse and select the metadata XML file that
you downloaded from Control Hub.
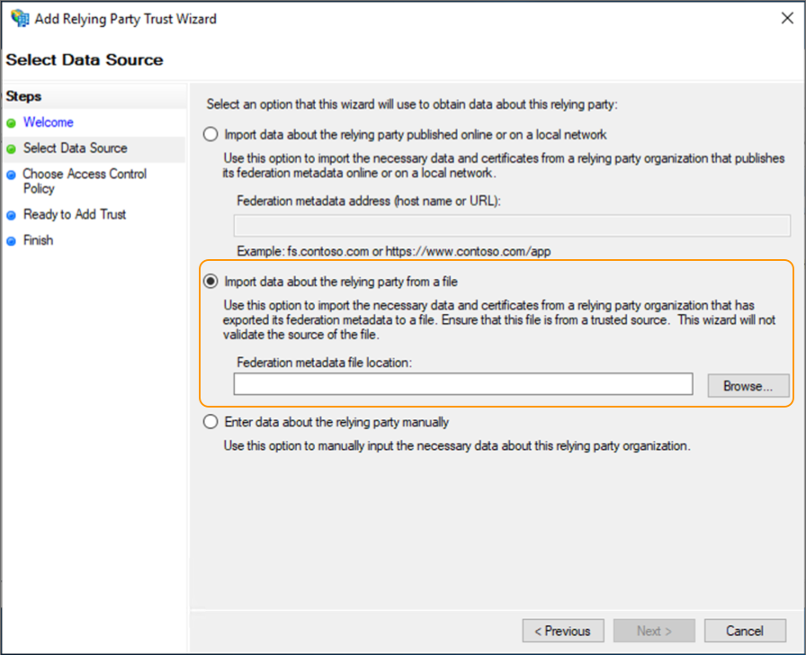
- Click Next.
-
In the Specify Display Name page of the wizard, enter a
display name.
For example, you might enter StreamSets SAML.
- Click Next.
- In the Choose Access Control Policy page of the wizard, choose the policy required by your corporate regulations, and then click Next.
- In the Ready to Add Trust page of the wizard, verify your configurations, and then click Next.
-
In the Finish page of the wizard, select
Configure claims issuance policy for the application,
and then click Close.
The Edit Claims Issuance Policy for <relying trust name> dialog box appears.
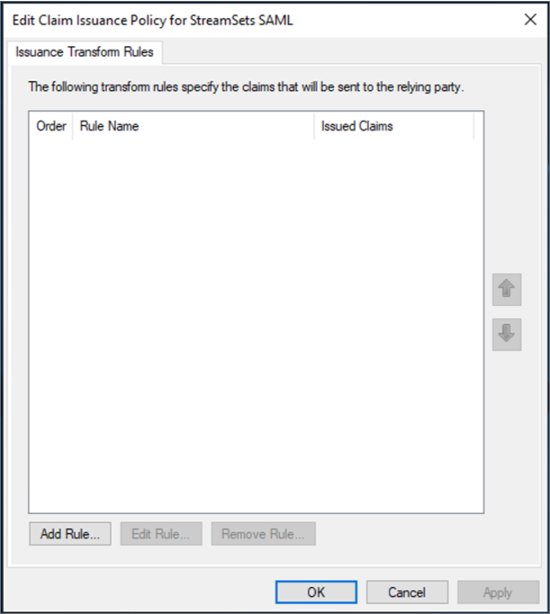
- Click Add Rule.
- In the Choose Rule Type page of the claim rule wizard, select Send LDAP Attributes as Claims for the Claim rule template property.
- Click Next.
-
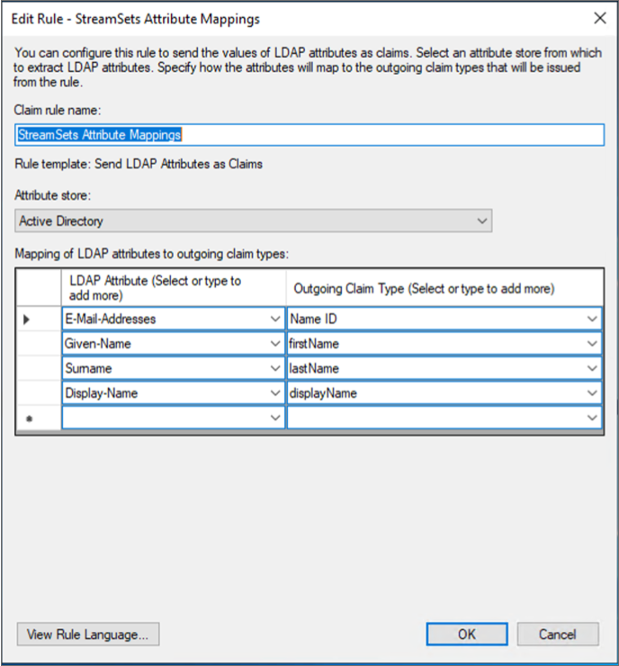
In the Configure Claim Rule page of the wizard, enter a
name for the rule.
For example, you might enter StreamSets Attribute Mappings.
- For the Attribute store property, select Active Directory.
-
In the Mappings table, configure the following attribute
mappings so that AD FS passes user information to IBM StreamSets.
Configuring the email address is required. Configuring the user names is optional. For more information, see IdP Attribute Mappings.
LDAP Attribute Outgoing Claim Type E-Mail-Addresses Select Name ID from the drop-down menu. Given-Name (optional) Type firstName. Surname (optional) Type lastName. Display-Name (optional) Type displayName. For example, the following image displays mappings for the required email address and the optional user names:
- Click OK.
-
In the Edit Claims Issuance Policy for <relying trust
name> dialog box, click OK.
The AD FS Management tool displays the relying party trust added for IBM StreamSets.
-
Use Microsoft PowerShell to run the following command on the server where AD FS
is installed:
Set-AdfsRelyingPartyTrust -TargetName "<relying trust name>" -SamlResponseSignature "MessageAndAssertion" -
To enable IdP-initiated logins from AD FS, use PowerShell to run the following
command on the server where AD FS is installed:
Set-AdfsProperties -EnableIdPInitiatedSignonPage $true -
Retrieve the AD FS metadata file.
Step 3. Set up a Draft SAML Configuration
In Control Hub, set up the draft SAML configuration for your organization by uploading the metadata XML file downloaded from AD FS, and then optionally configuring advanced properties. You can also enable or disable SP-initiated logins.
- In the Control Hub Navigation panel, click .
- Click Configure SAML.
- Click the Draft tab.
-
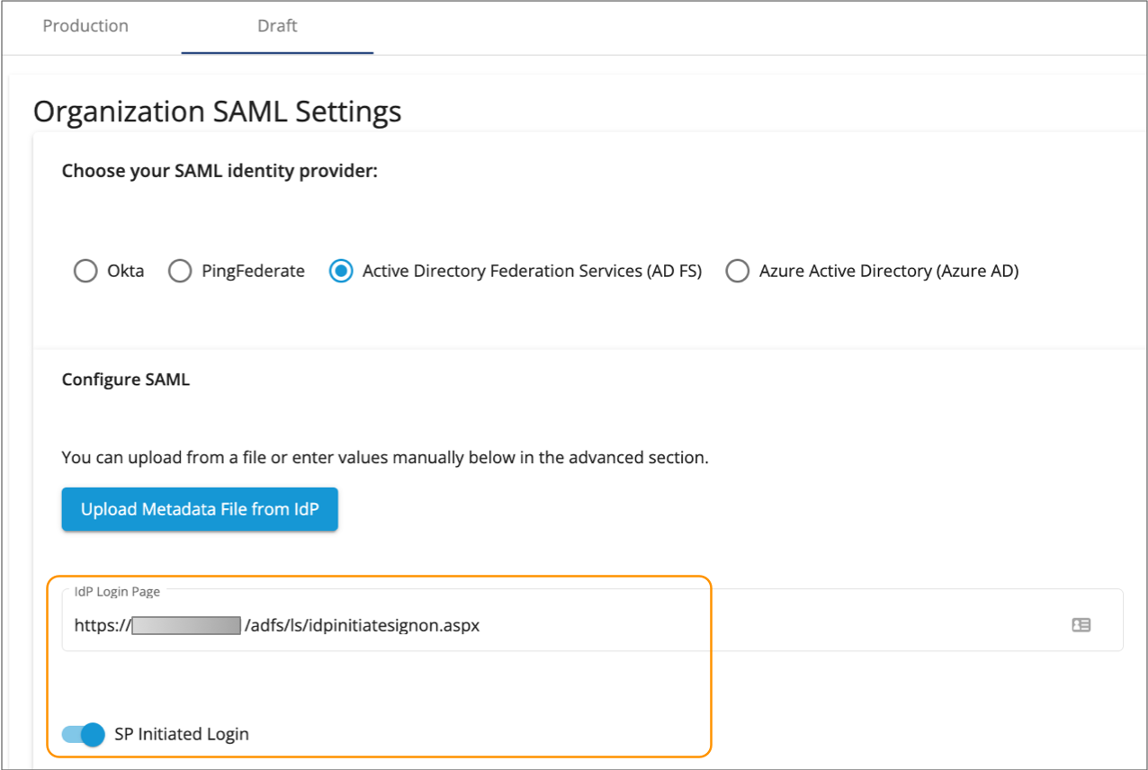
In the Organization SAML Settings section, click
Upload Metadata File from IdP and upload the metadata
file that you downloaded from AD FS.
By default, the IdP Login Page property is automatically populated from the uploaded metadata, and SP-initiated logins from IBM StreamSets are enabled, as follows:
-
To disable SP-initiated logins and require IdP-initiated logins, disable the
SP Initiated Login property.
For more information, see IdP and SP-initiated Logins.
-
If you created custom attribute statements in AD FS that do not match the
default values displayed for the IdP user properties, modify the property values
as needed.
If you created the attribute mappings as instructed in Step 2. Create an AD FS Relying Party Trust, you can use the default values. For more information, see IdP Attribute Mappings.
-
Optionally, click Show Advanced and modify the advanced
properties.
Control Hub automatically populates the advanced property values from the uploaded metadata file. In most cases, you do not need to modify the advanced properties.
- Click Save.
-
If you enabled SP-initiated logins, click Test to test
the configuration.
The SAML debug console displays, indicating whether IBM StreamSets is able to successfully send a request to AD FS and receive a response. In case of a failure, use the listed errors to help you troubleshoot issues.
Step 4. Publish and Enable the SAML Configuration
After testing and validating that the draft SAML configuration is set up correctly with AD FS, publish the configuration to production and then enable the configuration to activate it.
- In the Draft tab, click Publish in the Organization SAML Settings section.
-
Click Confirm.
The Production tab displays a read-only version of the SAML configuration.
- In the Production tab, click Enable to enable SAML authentication for your organization.
-
Click Confirm.
When enabled, all organization users must log in using SAML authentication. For more information, see IdP and SP-initiated Logins.
To invite new users to the organization, first verify that the users exist in Microsoft Active Directory Domain Service (AD DS). Then in Control Hub, use the email addresses from AD DS to invite the users. For more information, see Adding Users.
If existing organization users are AD DS users and originally joined with their email address from AD DS, they can use SAML authentication for the next login session. If existing organization users joined with a different email address, you must add them to the Control Hub organization again using their email address from AD DS.