Managing Environments
When you manage environments, you can filter the list of displayed environments, activate or deactivate environments, edit environments, and view all deployments belonging to the environment.
When needed, you can delete an environment when no deployments belong to the environment.
You can also share environments with other users and groups, as described in Permissions.
Filtering Environments
In the Environments view, you can filter the list of displayed environments by environment type, state, or tag. Or you can search for environments by name.
- In the Control Hub Navigation panel, click .
-
If the Filter column does not display, click the Toggle Filter
Column icon:
 .
.
The following image displays the Filter column in the Environments view:
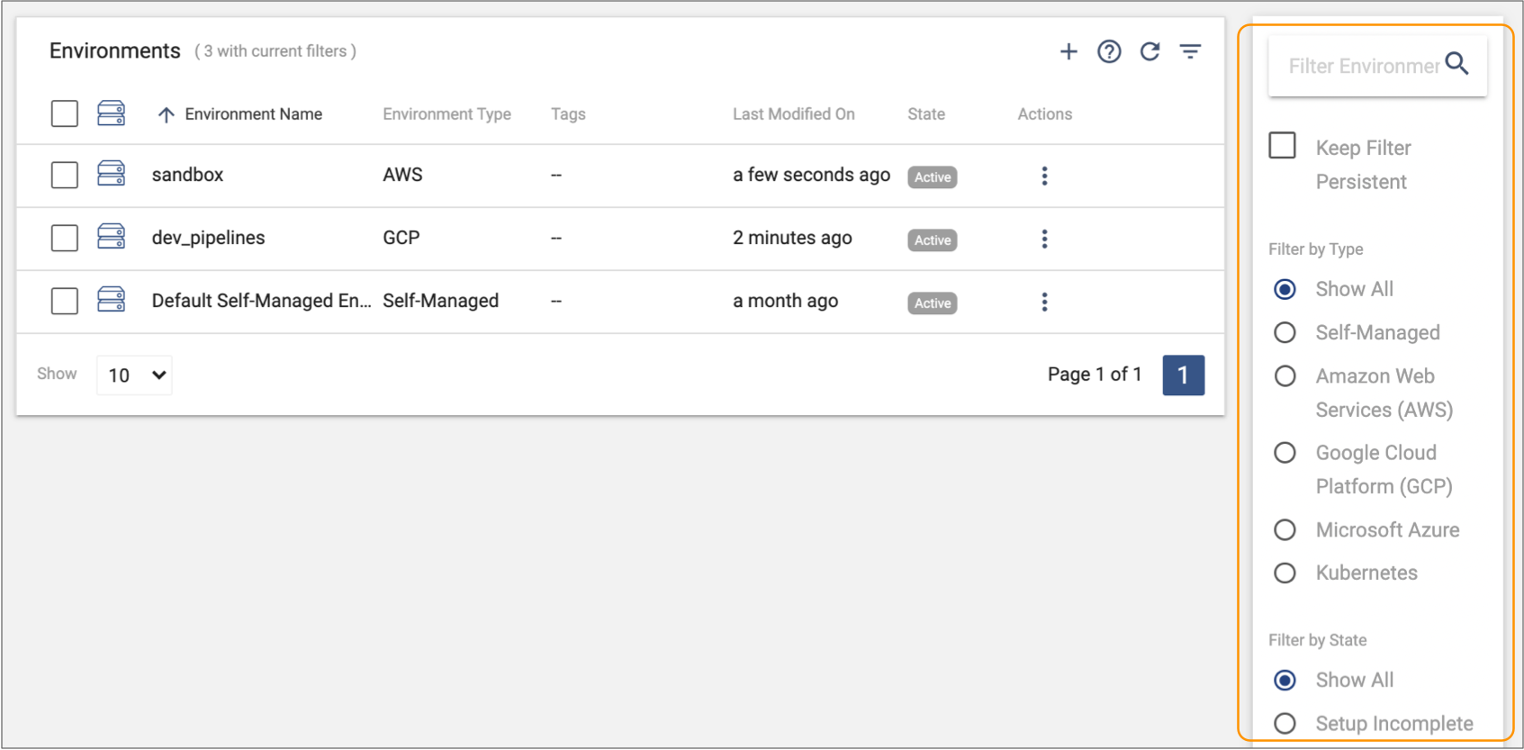
- To search for environments by name, enter text in the search field, and then press Return.
- Select an environment type, state, or tag to additionally filter the list of environments.
-
Select the Keep Filter Persistent checkbox to retain the
filter when you return to the view.
Tip: To share the applied filter, copy the URL and send it to another user in your organization.
Activating Environments
You must activate an environment before you can create deployments for the environment. You can activate an environment when you create it, or you can activate it at a later time.
You can activate an environment that is in the Deactivated or Deactivation Error state.
- In the Control Hub Navigation panel, click .
-
Select the deactivated environments, and then click the
Activate icon:
 .
.
- Click OK to confirm the activation.
Deactivating Environments
Deactivate an environment when you want to temporarily prevent engine instances from being deployed to that environment. You cannot create new deployments for deactivated environments.
- The environment is in the Active or Activation Error state.
- No active deployments belong to the environment.
- In the Control Hub Navigation panel, click .
-
Select the active environments, and then click the
Deactivate icon:
 .
.
- Click OK to confirm the deactivation.
Editing Environments
You can edit environments when they are in any state except for the transient Activating and Deactivating states.
When you edit an active environment, active deployments might be impacted because deployments can inherit values from the parent environment.
For example, let's say that an EC2 deployment uses the default instance profile defined for the parent AWS environment. If you edit the active environment to use a different default instance profile, then after a short delay, Control Hub transitions the deployment to an Activating state while it updates the deployment to use the new instance profile. AWS Cloud Formation then updates the existing EC2 instances to use the new instance profile. After the updates finish, the deployment transitions to an Active state.
To edit an environment, select the environment name on the Environments view, and then click Edit.
Viewing Deployments in an Environment
When you view the details of an environment, you can view the list of deployments that belong to the environment.
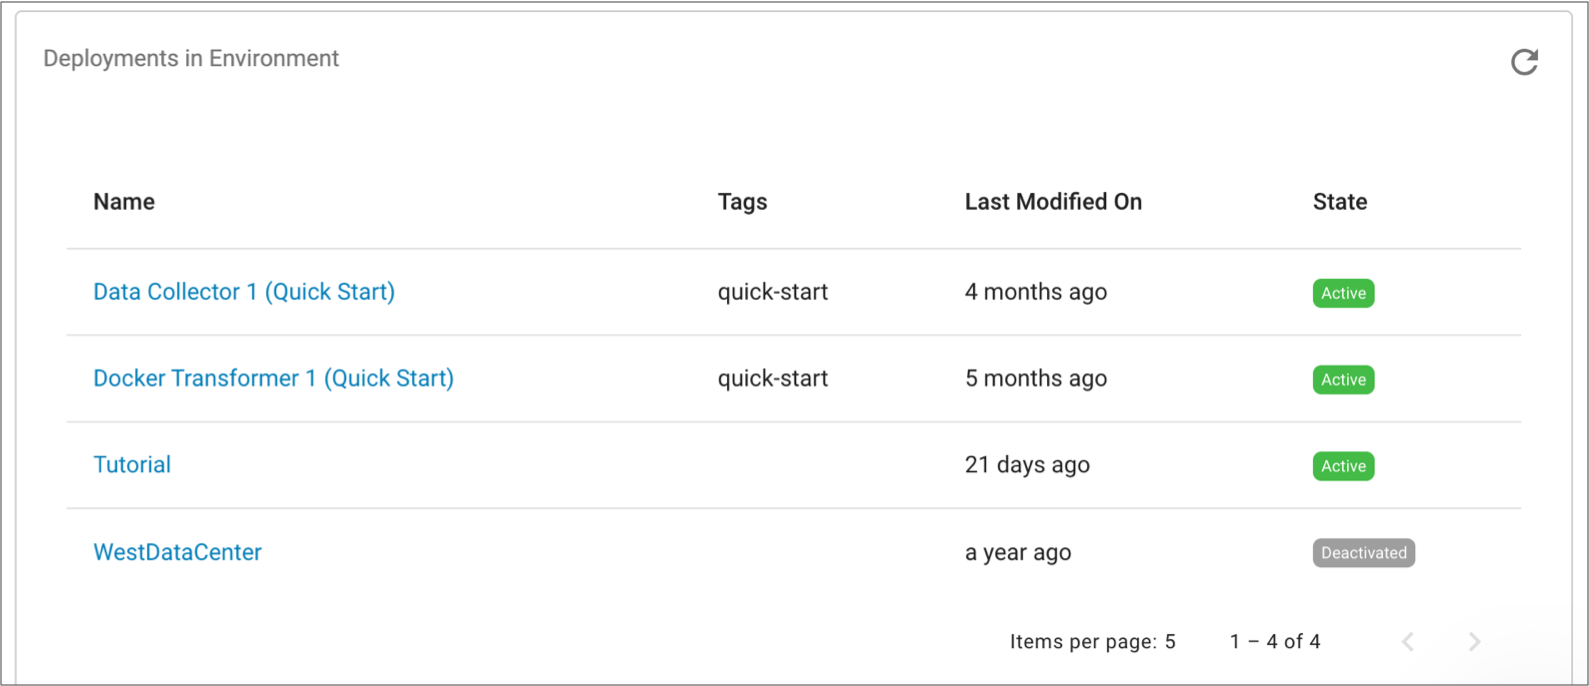
To view the list of deployments, click an environment name in the Environments view and then locate the Deployments in Environment section in the environment details.
To view details about a specific deployment, click the deployment name. When you view deployment details, you can access deployment event logs and view the list of engine instances belonging to the deployment.
The following image shows four deployments that belong to the default self-managed environment:
Deleting Environments
Delete an environment when you no longer want to deploy engine instances to that environment.
You can delete an environment when no deployments belong to the environment.
- In the Control Hub Navigation panel, click .
-
Select the environments, and then click the Delete icon:
 .
.
- Click OK to confirm the deletion.