Assigning Labels to a Data Collector or Transformer
You can assign labels to a Data Collector or Transformer in the following ways:
- Control Hub configuration file
-
Define labels in the Control Hub configuration file,
dpm.properties, to assign labels that cannot be removed in the Control Hub UI. Labels assigned in the Control Hub configuration file can only be removed by editing the Control Hub configuration file. - Control Hub UI
-
Assign labels in the Control Hub UI to quickly assign labels that can also be removed using the UI.
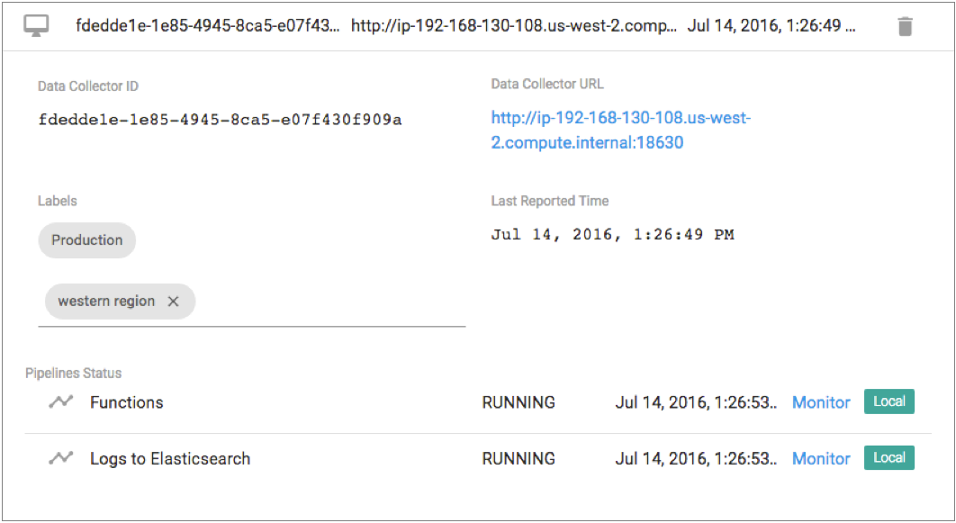
The following image shows a Data Collector
with two labels. The Production label was assigned in the Control Hub
configuration file, and so can only be deleted by modifying the configuration file
again. The western region label was assigned in the Control Hub UI,
and so can be deleted by clicking the X next to the label name.
Using the Control Hub Configuration File
You can assign labels by defining them in the Control Hub
configuration file, dpm.properties, used by each Data Collector or Transformer.
Edit the Control Hub configuration file to assign labels for a Data Collector or Transformer that cannot be deleted using the Control Hub UI. You must edit the Control Hub configuration file to delete labels defined in the file.
By default, the dpm.properties file for each Data Collector
and Transformer is configured to use an all label. Keep the default
all label if you plan to start some jobs on all registered Data Collectors or Transformers. If you do not plan to start jobs on all registered Data Collectors or Transformers, then remove the default label.
-
On the execution engine machine, use a text editor to open the
dpm.propertiesfile.- Control Hub configuration file for Data Collector:
$SDC_CONF/dpm.properties - Control Hub configuration file for Transformer:
$TRANSFORMER_CONF/dpm.properties
- Control Hub configuration file for Data Collector:
-
Modify the value of the
dpm.remote.control.job.labelsproperty. To assign multiple labels, enter a comma-separated list of case-sensitive labels.For example, to remove the defaultalllabel and to assign a Finance label and a Production label, define the property as follows:dpm.remote.control.job.labels=Finance,Production -
Restart the execution engine to enable the changes.
When you log in to Control Hub and view the details for the execution engine, you'll see the new labels.
Using the Control Hub UI
You can assign labels when you view the details of a registered Data Collector or Transformer within Control Hub. Use the UI to assign labels when you want to allow the deletion of the labels through the UI.
-
To assign a new label to a Data Collector, in the Navigation panel, click .
To assign a new label to a Transformer, in the Navigation panel, click .
- Expand the details for the Data Collector or Transformer that you want to assign a label to.
- Under the Labels property, click Enter New Labels.
-
Type the case-sensitive label, and then hit Enter.
The new label displays.You can remove the label by clicking the X next to the label name.
- Click Save.